
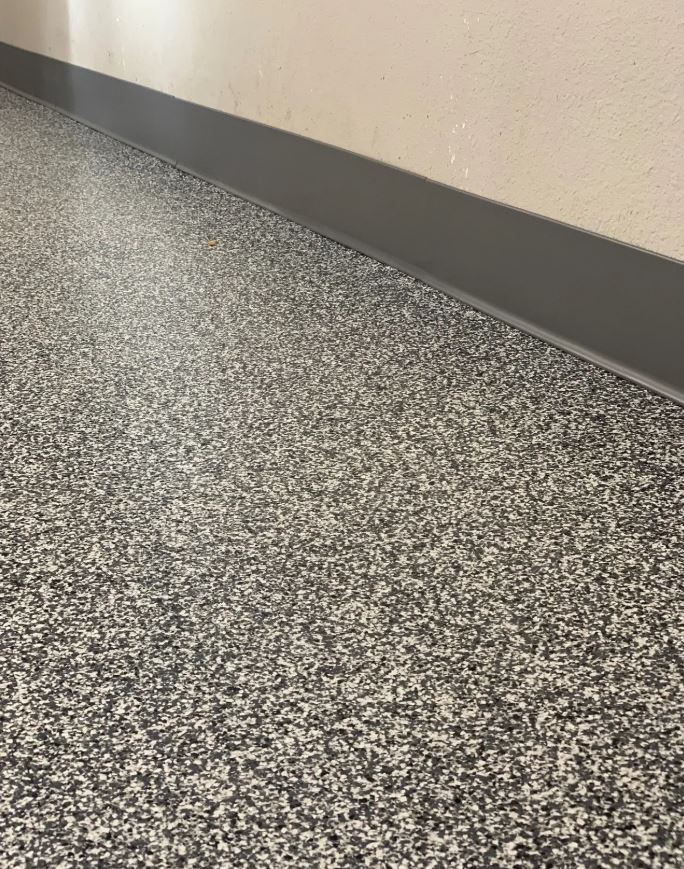
Flake flooring systems improve regular epoxy floors. Instead of a solid color, decorative flakes (colorful vinyl chips) go into the wet epoxy. This creates a textured, nice-looking surface.
Here is why this matters. It looks great, especially in garages or warehouses. The flakes add slip resistance for safety. Also, they hide concrete imperfections. Need a reliable Flooring Contractor in Denver homeowners trust for expert floor repair.. Cracks or stains? Flake flooring helps mask those.
There are different flake types, sizes, colors, and materials. Flake density matters. You can lightly sprinkle or fully cover the epoxy. After the epoxy cures, a clear topcoat seals the flakes. This provides a lasting, easy-to-clean surface.
For homeowners, it makes garage floors look better than plain concrete. Commercial property owners like that it is durable. Real estate investors find it a relatively cheap way to make a property more appealing. General contractors and property managers in Denver find it a reliable flooring choice that clients like.
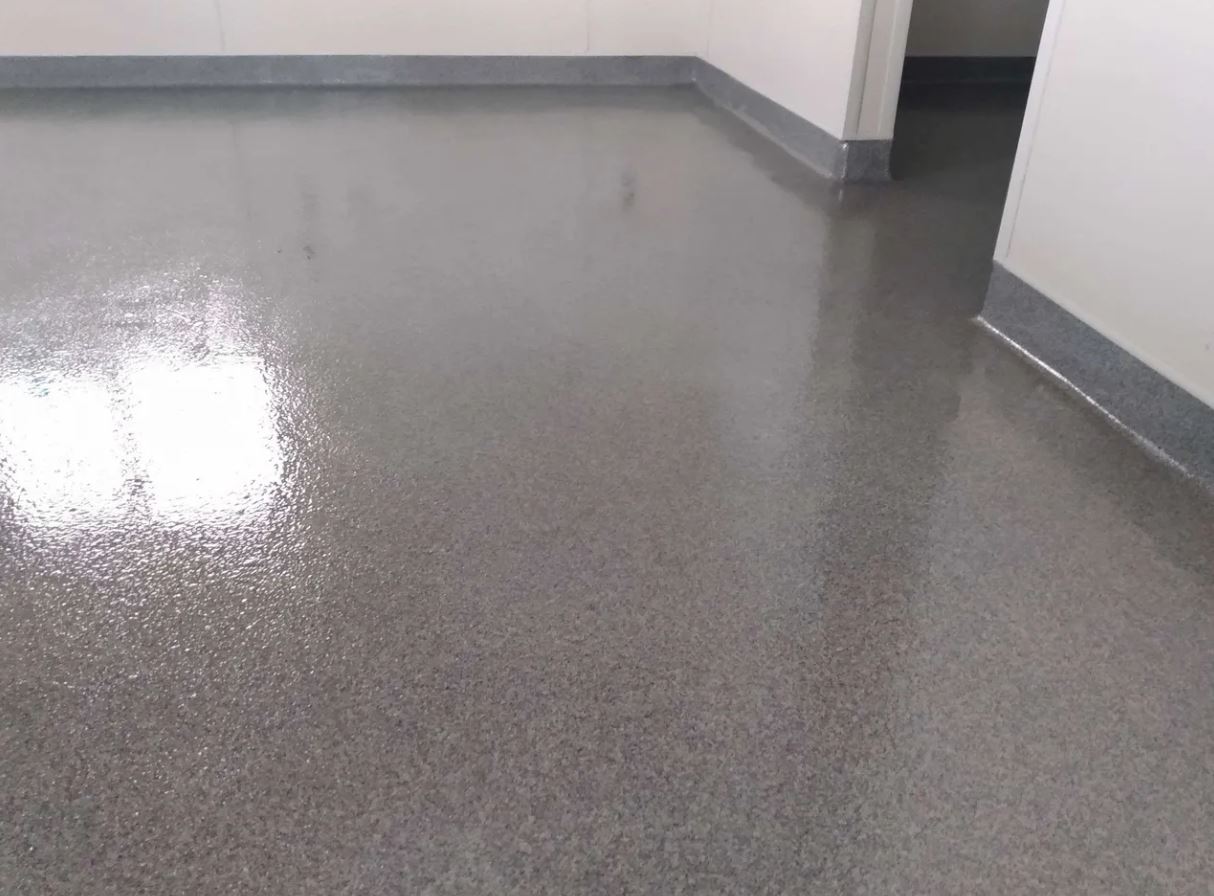
When you install a flake system, even distribution matters. It's important. The flakes create the floor's look. If you clump them or leave bare spots, it looks bad and uneven. That defeats the purpose.
What if you don't get it right? The floor won't have a consistent, textured look. Some areas might look dense, and others plain. This looks unprofessional and affects slip resistance. Too many flakes might make it slippery. Too few, and you don't get the full benefit.
One problem is not using enough flakes. People try to save money, but it looks cheap. Another problem? Uneven spreading. Some people just toss them. The trick is an even spread. It takes practice, but it's worth it for a professional look. Aim for full, even coverage across the entire surface while the epoxy is wet. That way, the flakes stick and you get a uniform texture.
Before you apply epoxy, the floor must be spotless. Remove all dust, debris, and anything else stuck to the surface. Use a shop vac and a scraper for stubborn spots. If you skip this, the epoxy won't bond correctly. The flakes won't stick, and you'll have peeling and an uneven mess. Don't cut corners here.
Grinding opens the concrete pores, which helps the epoxy grab on. Use a concrete grinder with diamond grinding pads. Don't be too aggressive. Just create a profile, and don't remove layers of concrete. Without grinding, the epoxy sits on a smooth surface and is likely to fail. Proper grinding also helps level minor imperfections for a smoother look.
Cracks and holes must be fixed. Use a concrete patching compound made for epoxy floors. Follow the product instructions for mixing and application. Let it cure before moving on. Ignoring these imperfections creates weak spots in your epoxy and can even cause the epoxy to crack later. Patching now saves headaches and money later.
Don't forget the edges. Use an edger grinder to get against the walls. This ensures a smooth transition and a pro look. Hand-scraping works, but it takes more time. Pay attention to corners; they can be tricky. The goal is a consistent profile along the floor's perimeter.
One last vacuum is key. Grinding creates dust, even with dust collection systems. Get every bit of it. Use a tack cloth or microfiber mop to pick up any remaining fine particles. This ensures the epoxy sticks and prevents textures or blemishes from showing up in your finished floor. It's the last step before the magic, so don't skip it.
When you install a flake system, choosing the right epoxy and the flakes is important. You can't just grab any epoxy and any flakes and hope for the best.
Consider where the floor will be. Will a garage see heavy use and maybe some chemical spills? Or do you want a specific look for a showroom? For garages and workshops, you want a thicker, more chemical-resistant epoxy. Something that can handle wear. For showrooms or offices, you might want a thinner epoxy that gives a smooth, glossy finish.
Then there are the flakes. Size matters. Bigger flakes give you a more textured look. Smaller flakes create a more subtle, granite-like appearance. Also, color is key. You can go with a single color for a uniform look, or blend multiple colors for something unique. Don't forget the material. Some flakes are vinyl, some are metallic, and some are made from recycled materials. Metallic flakes can add shimmer, but they might not be as durable in high-traffic areas.
If you get the epoxy or flake choice wrong, your floor could peel, fade, or just not look right. Planning saves trouble later.
When you apply the flake system, you have a couple of options. You can spread the flakes by hand, which means grabbing handfuls and tossing them. The trick? Be consistent and avoid clumping. Overlap is not good.
The other option is a centrifugal spreader. It spreads epoxy flakes. These give you a more even spread, mainly over larger areas. If you're doing a big warehouse floor, it's a good buy.
No matter which way you choose, watch for bare spots. They will stand out. If you see any, add some extra flakes right away while the epoxy is still wet.
A common mistake is not using enough flakes. Usually, the goal is full spread, where the floor is fully covered. If you skimp, you won't get the look or feel you want. Also, wear spiked shoes, or you’ll leave footprints in the wet epoxy. You don’t want that.
When you broadcast flakes, don't just start throwing them. You need a few things to do it right. First, consider a good flake spreader. These aren't always needed, but they help spread the flakes evenly, especially over large areas. This saves time, and you avoid clumps or bare spots.
Next, get spiked rollers. After you broadcast the flakes, gently roll the spiked roller over the surface. This helps the flakes settle into the epoxy, so they bond fully and don't get kicked up later.
Safety gear matters, too. Get gloves to protect your hands from the epoxy. Use a mask, so you don't breathe in fumes or flakes. Eye protection is also a must. You don't want anything splashing in your eyes while you're working.
If you skip steps, your floor might look uneven or not last. It could even be unsafe. So, take time to get the right tools and protective gear before you start. It makes a big difference.
You're broadcasting flakes. What could go wrong? A few things. Bubbling is a big one. This happens when air gets trapped in the epoxy as it cures. Often, it’s because the surface wasn’t prepped well. Grind or profile the concrete first. Also, watch the temperature. If it's too hot, the epoxy can cure too fast and trap air.
Then there are fisheyes. These are little craters that appear where the epoxy repels from something on the floor, like oil or silicone. Clean the floor thoroughly before you start.
Uneven texture? That's usually from inconsistent broadcasting. Some spots get too many flakes, others not enough. Practice helps, but a good tip is to use a seed spreader. It helps distribute the flakes evenly. And don't skimp on the flakes! You want full coverage for the best look and durability. If you don’t get full coverage, you’ll see the base coat color through the flakes.
Finally, remember to apply a topcoat. This seals everything and provides a smooth, durable surface. Without it, the flakes will eventually start to come loose, and the floor will be hard to clean.
After you broadcast the flakes, let the epoxy cure. This step is very important. Follow the manufacturer's time guidelines, typically 24-72 hours, depending on the product and temperature. Don't rush. Walking on it too soon will mess up the finish, and the flakes might not fully bond.
Next: sealing. Sealing protects the flakes and the epoxy underneath from wear, chemicals, and UV damage. The flakes are the design, and the sealer protects them.
You have sealant choices. Clear epoxy is one. It’s durable and glossy. Polyurethane is another choice, known for UV resistance, which is good if the floor gets sunlight. Polyaspartic coatings are tough and fast curing, so they’re great for busy areas where you can't have much delay.
Whatever you choose, be sure it's compatible with the epoxy you used for the base coat. Read the product details. Apply the sealant evenly. Several thin coats work better than one thick one to avoid bubbles or cloudiness. This step makes the floor last and look good.
Maintaining your flake flooring is straightforward. Doing it right greatly affects its lifespan and appearance. Regular, small efforts prevent bigger issues later.
For general cleaning, regularly sweep or vacuum to remove loose dirt. This stops particles from grinding into the surface, which can dull the finish. When you mop, use mild soap and water. Strong chemicals can harm the epoxy and flakes, so use something gentle.
One often missed step is using mats at entrances. These catch dirt before it reaches the floor, mainly in busy areas. Also, handle heavy items with care. Dragging furniture across the floor can scratch the epoxy. Use furniture pads to protect the surface.
If you spill something, clean it quickly. Some things can stain or harm the epoxy if left too long. Finally, think about re-coating the floor every few years. This adds protection and keeps it looking good. Skipping care can cause wear, leading to bigger, more expensive repairs later.
Let's discuss what you will pay for a flake floor. It involves more than just the flakes.
First, there are materials. You have the epoxy, the flakes, and the topcoat. Don't skimp on the epoxy or topcoat. That is where the durability comes from. Cutting corners here is a bad idea.
Then there is labor. This is not a simple DIY project unless you know what you are doing. You are paying for someone's skill in surface preparation, mixing the epoxy correctly, spreading the flakes evenly, and applying the topcoat without bubbles or imperfections. Denver labor costs can change, so get a few quotes.
Surface preparation is also important. If your concrete is cracked, uneven, or has old coatings, that needs to be addressed first. Grinding, patching, or even self-leveling adds to the cost, but it is for a long-lasting floor. Incorrect preparation is the main reason flake floors fail early.
So, what is the estimate? For a basic garage floor in Denver, you might pay from $5 to $10 per square foot. It may be more depending on the complexity and the products you choose. Get detailed quotes that show the material and labor costs. Ask questions about the preparation work. A good contractor will be open about all of this.
When you apply a flake system, you might want to do it yourself. But there are good reasons to consider hiring a pro.
First, experience counts. Flooring contractors who focus on epoxy flake systems have seen a lot. They know how concrete reacts, how temperature and humidity affect the epoxy, and how to get even flake distribution. They know what to do if there is a problem.
Then there is the work quality. A pro preps the floor right, uses the right equipment, and applies the epoxy and flakes with care. This is not just about looks. It is about how long the floor lasts and how well it holds up. Plus, they often have access to better materials that are not available to everyone.
Do not forget the warranty. Most flooring contractors offer warranties on their work. If something goes wrong, like the epoxy peeling or the flakes not sticking, you are covered. You cannot get that from a DIY project.
Yes, hiring a professional costs more at first. But when you think about the know-how, the material and work quality, and the warranty, it is often the better choice. This is true if you want a floor that looks good and lasts.
Several factors influence the quality of flake broadcasting, including flake type, application method, and environmental conditions. The size and shape of the flakes impact their spread, while the technique used affects uniformity. Ambient temperature and humidity can also alter the epoxy's viscosity, affecting flake adhesion and distribution.
Achieving optimal flake application requires specific tools and techniques tailored to the epoxy flooring system. Adjustable spreaders, specialized sprayers, and manual broadcasting methods each offer unique advantages. Mastering these techniques ensures uniform flake distribution, prevents waste, and enhances the final appearance of the floor.
Evenly broadcasting flakes is crucial for a uniform epoxy floor texture. This involves a strategic approach to ensure flakes are dispersed without clumping or bare spots. Techniques include using a calibrated dispenser and overlapping passes for complete coverage. Proper distribution enhances both the aesthetic appeal and the durability of the epoxy flooring.

Flake system applications offer great versatility. You can get creative with the look. It's more than just throwing some flakes down and hoping for the best.
Consider the space. Is it a garage, a showroom, or a commercial kitchen? The flake type and color should fit the environment. Darker flakes on a gray base hide dirt and tire marks in garages. You might want something brighter in showrooms to catch the eye.
Density matters. A light broadcast adds a subtle texture. A full broadcast covers the base coat. Most people aim for something in between. A full broadcast needs more topcoats to bury the flakes.
Don't forget the topcoat! It protects the flakes and gives the floor its final sheen. A clear epoxy topcoat works. You can also use a polyurethane topcoat for extra durability and UV resistance, mainly in sunny areas.
Mistakes occur. One big mistake involves unevenly broadcasting the flakes. You'll get patchy areas and an inconsistent look. Another is skipping prep work. If the concrete isn't cleaned and prepped, the epoxy won't bond, and the system will fail.
With planning and the right materials, a flake floor can change any space. It's durable, easy to clean, and looks good.
Let's explore some common questions about flake flooring. How durable is it? When installed with a quality epoxy base and topcoat, flake floors are very tough. They withstand a lot of foot traffic, so you see them in garages and warehouses.
What about slipping? The flakes add texture, which improves slip resistance. You can add anti-slip additives to the topcoat for extra grip, which is important in wet areas.
Maintenance is usually easy. Sweep or vacuum regularly. For tougher messes, mop with mild soap and water. Avoid harsh chemicals that could damage the epoxy.
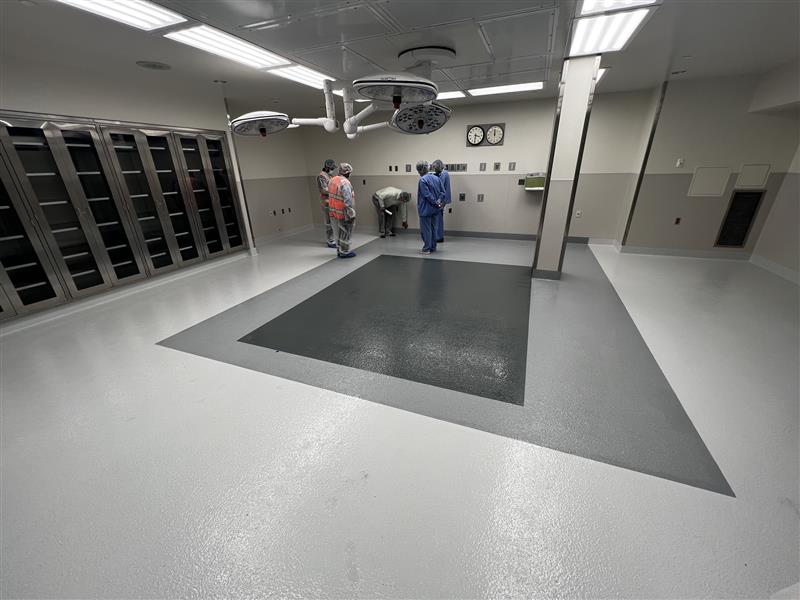
Are flake floors right for every space? Maybe not. They're great for garages, basements, and commercial spaces, but they might not suit a living room. It depends on the look you want. One benefit is that the flakes hide imperfections in the concrete. Cracks or stains? Flakes can mask those. Plus, you get many color and style choices, so you can customize the look.
A flake system does more than make a floor look good. It adds strength and hides flaws. Garages and warehouses see heavy use. Flakes mask wear.
Even flake spread is key. You scatter these flakes into a wet epoxy. Clumps create an uneven look. You don't want that. Flakes come in sizes, colors, and materials. Pick what suits your style and the area.
Flake density also matters. Too few flakes, and you miss the full effect. Too many, and you risk the epoxy's strength. Find the right balance. After the flakes, add a topcoat. This seals everything, protects the flakes, and makes the floor smooth and easy to clean.
Skip the topcoat, and the flakes may lift or get damaged. Redoing a floor is no fun. The right application makes the floor look great and last for years. It can change a space, making it more useful and better looking.
Want to upgrade your floor with a flake system? Contact us for a quote, and we can discuss the best choices for your project.